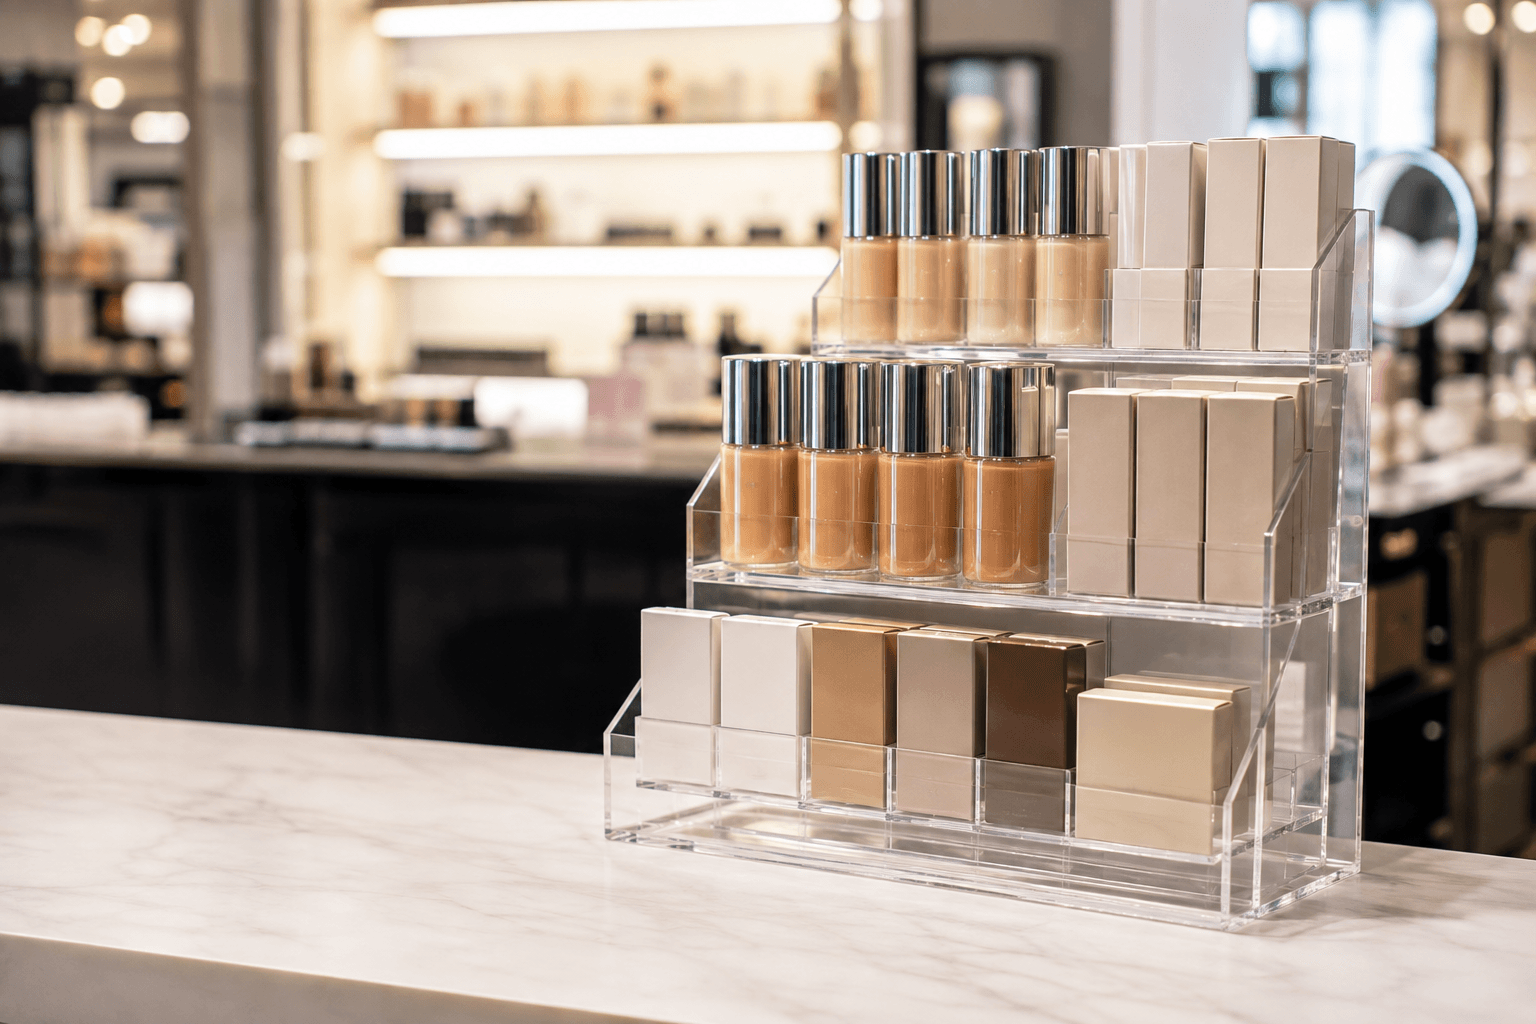
An acrylic retail display is expected to do two jobs at once. It needs to make products easy to see and choose, while also surviving handling, replenishment, cleaning and delivery. A display that looks impressive in a render but fails to fit the product, shelf or packing plan can create more work for a retail team than it removes.
The best custom acrylic displays are designed from the retail environment backward. They start with the item being sold, the space available, how shoppers will approach it, how staff will replenish it and how the finished unit will travel. Only then should the project move into materials, printing, construction and quotation.
This guide gives brand teams, retail buyers and distributors a practical way to brief, compare and approve custom acrylic displays.
Quick answer: what makes an acrylic display effective?
An effective acrylic display makes the product—not the fixture—the first thing shoppers notice. It uses a stable structure, clear product-facing information, sufficient capacity, practical access for staff and a packing plan that matches the route to store. The correct material thickness and construction depend on the product load, span, display height and expected handling; they should be confirmed through a drawing and sample review, not chosen from a generic rule.
Begin with the merchandising objective
“We need an acrylic display” is not yet a usable brief. Start by defining the merchandising objective. Are you introducing a hero SKU at a checkout counter, presenting a collection at eye level, keeping testers organised, displaying a premium boxed product, or creating a branded riser for a launch event?
Each objective changes the construction. A countertop unit may need a small footprint and easy replenishment. A fragrance or beauty display may need tiered visibility and a wipe-clean surface. A technology accessory display may need product-security considerations, cable access or a precise device angle. A retail riser may need to disappear visually so the product appears to float.
Write down the following before asking for a design:
- Product dimensions, weight and number of SKUs.
- Required display capacity and replenishment frequency.
- Fixture location: counter, shelf, window, wall, checkout, trade-show table or showroom.
- Available width, depth and height, including nearby signage or shelving.
- Shopper interaction: look only, lift and replace, test, compare or take a brochure.
- Brand elements: logo location, colour, messaging hierarchy and required compliance copy.
- Rollout plan: single flagship location, several stores, distributor kit or international shipment.
This turns a display request into a decision-ready design problem.
Design for sightlines, reach and replenishment
Retail displays work when they reduce friction. A shopper should see what the product is, understand the choice and reach it without knocking over adjacent units. Staff should be able to refill the display without dismantling it or moving unrelated products.
Put the product in the visual priority position
The front face of a display is valuable space. It should communicate the product category or key benefit in a few readable words, but it should not become a billboard that blocks the merchandise. Transparent acrylic is useful because it can add height and separation without creating a visually heavy fixture.
When the display includes multiple levels, test the actual product sightline. A tall front lip may secure the product but hide labels. A high back panel may support a logo but block a shelf-edge message. A simple mock-up with the real product, even in paperboard or a rough sample, can reveal these conflicts early.
Make replenishment part of the drawing
Ask how a store associate will load, remove and clean the unit. Can products be added from the rear? Is there enough finger clearance? Will packaged products catch on an internal divider? Does the display need a removable tray or a fixed set of compartments?
These questions matter especially for multi-store programmes. An elegant display that requires a special technique to refill may work in a showroom but become a problem in a busy retail network.
Match acrylic material and construction to the use case
There is no single “best acrylic thickness” for retail display. Thickness needs to be evaluated alongside the span, load, number of bends, attachment method and type of handling. A small counter riser carrying lightweight boxed products has different needs from a large multi-tier display or a freestanding construction.
| Use case | Useful design focus | Supplier questions to ask |
|---|---|---|
| Countertop product tray | Stable footprint, clear price or logo area, easy access | What product load and front-lip height is the design built for? |
| Tiered retail riser | Sightlines, clean tier spacing, anti-slip placement | How will the tiers be bonded or mechanically fixed, and how will the unit be packed? |
| Branded display case | Dust protection, doors or openings, premium clarity | How are hinges, handles and corners protected from scratching? |
| Shelf sign or information holder | Readable insert, simple replacement, safe edges | What paper or insert dimensions does it accept, and how is it held in place? |
| Trade-show display | Quick set-up, visual impact, transport efficiency | Can it be flat-packed or separated safely for repeated set-up? |
Clear, frosted and coloured acrylic
Clear acrylic is a strong default when the goal is to keep attention on the product. Frosted material can reduce visual noise, hide some construction details or create a softer premium look. Coloured acrylic, printed panels and layered inserts can bring a brand system into the fixture, but they should be tested with the actual products on display. The contrast that looks attractive against a white background may disappear once colourful packaging is added.
Edges, bends and bonded joints
The difference between an ordinary display and a convincing retail fixture often appears at the edges and joints. Buyers should ask how cut edges will be finished, where bonds will be visible, whether there are sharp corners, and whether a protective film remains on the product until final assembly or shipment.
For a bent or bonded acrylic display, the supplier should identify the assembly order and the areas that receive load. This is not unnecessary engineering language. It helps a buyer distinguish between a visual mock-up and a display that has been considered for regular retail use.
Build the brand into the display without obscuring the product
Branding should guide the shopper to the product, not compete with it. A small printed logo on the back panel, a removable graphic insert, a UV-printed front strip or a colour-accent base may be enough. Large opaque panels can make a compact display feel heavier and can block sightlines.
Before production, agree on where each brand element appears:
1. Primary logo position and viewing direction. 2. Product-category or campaign message. 3. Any mandatory legal, price or barcode-holder area. 4. Retailer-specific graphics if the display will be co-branded. 5. Whether graphics are permanent prints, replaceable paper inserts or removable decals.
If a buyer expects seasonal campaigns or regular product-line changes, replaceable graphics may deliver more value than a fully printed fixed unit. If the display represents a premium permanent installation, a precise printed or engraved acrylic panel may be the better choice.
Use a sample to test the real retail scenario
Digital rendering is valuable for sign-off, but it cannot show every practical issue. A physical prototype or pre-production sample lets the team test product fit, stability, legibility, reflection, shelf footprint and staff handling.
Set up the sample using actual product packaging. Place it at the planned height if possible. Look at it from the shopper approach angle, not only straight on. Check whether the front row hides the back row, whether a printed panel reflects overhead lighting, and whether the unit can be filled and cleaned easily.
For an installation or a multi-store rollout, the sample review should also confirm preparation work: shelf measurements, any adhesive or fixing method, fixture orientation, placement instructions and carton labelling. This is where many avoidable problems are found—before hundreds of units are packed.
Plan inspection and shipping from the first quotation
A retail display is vulnerable to surface scratching, corner damage and misaligned assembly during transit. The shipping plan should be visible in the quotation and sample process, not added at the last minute.
Ask how individual units will be protected: film, bags, foam, corner guards, inner boxes or separated components. Ask whether the display ships assembled, partly assembled or flat-packed. Each option has a trade-off between store set-up time, carton size and risk of damage.
For a shipment inspection, a buyer can request checks such as:
- Correct dimensions and product-fit points against the approved drawing.
- Smooth, clean edges and consistent transparent surfaces.
- Correct print, insert or logo position.
- Stable bases, aligned shelves and secure bonded areas.
- Protective film, bags and corner protection applied as agreed.
- Inner-carton and outer-carton counts, labels and destination markings.
The right inspection scope depends on the project. The important point is that acceptance criteria are agreed before the goods are ready to ship.
Compare suppliers by their questions, not only their price
The lowest-priced design is not automatically the lowest-risk retail solution. A capable supplier will ask for product dimensions, expected load, display location, brand artwork, preferred material, pack-out and deadline. Those questions are evidence that the quotation is being built around the job rather than a generic photo.
When comparing quotes, make sure each scope covers the same display size, acrylic construction, print, assembly, protective packing and delivery terms. If one quote is much lower, identify what is absent before you assume it is a better deal.
Installation preparation: the overlooked part of a display project
For a display that will be used in more than one location, installation preparation deserves its own workstream. A display can be correctly manufactured and still fail operationally if it does not fit the shelf, requires an unexpected tool, arrives without placement instructions or uses an adhesive that is unsuitable for the retail surface.
Before approving the final sample, record the information the store team needs:
- The required shelf or counter footprint, including clearance around neighbouring fixtures.
- The orientation of the unit and the intended customer approach side.
- Which pieces, if any, are assembled separately.
- The fixing method: freestanding, non-slip pads, removable adhesive, mechanical fixing or a retailer-supplied support.
- The order in which products, graphics and inserts are placed.
- Cleaning guidance and any surfaces that should remain protected until final set-up.
- A photo of the approved display fully stocked with actual product.
If displays are shipped flat-packed or partly assembled, include a visual instruction sheet in every carton or retail kit. It should use photographed steps wherever possible and show completed orientation, not only exploded components. For a repeat rollout, test the instruction with someone who did not work on the initial sample. If they can assemble and stock the display without asking for help, the preparation is likely strong enough for stores.
Consider the full journey of the fixture
The display moves through more environments than the final retail counter: factory assembly, quality inspection, carton packing, export handling, warehouse receiving, store preparation, replenishment and eventual replacement. Each stage can create a different risk. Protective film may be useful until installation but frustrating if it is difficult to remove. A high gloss surface may look premium but show fingerprints in a tester area. A clear front lip may protect products but make small labels harder to see.
Listing these trade-offs during the design review demonstrates practical expertise and helps the buyer choose a construction that is easier to operate after the launch team has moved on.
Turn the retail brief into measurable design inputs
“Make it premium” is a useful creative direction, but it is not enough to engineer a display. Translate the brief into observable inputs before a supplier prepares the first drawing. State the product units the fixture must hold, the maximum product weight, the display footprint, the shelf or counter dimensions, the customer-facing side, the retailer’s cleaning routine and whether store staff may move the unit during replenishment.
If the fixture is expected to serve a campaign rather than permanent merchandising, include the campaign duration and replacement plan. A short-term pop-up may prioritise fast setup and compact shipping. A long-running display may need more robust construction, more generous product access and a way to replace scratched graphics or an individual component. These decisions are not visible in a moodboard, yet they strongly influence the material choice and quoted scope.
Use a drawing review before committing to a prototype
Before a full physical sample, ask for a dimensioned drawing or clear production render. Review it alongside the actual product, not in isolation. Check how the product enters and leaves the fixture, whether the logo remains visible when stocked, where fingers grip the item, and whether the centre of gravity stays within the intended footprint. For displays with shelves or dividers, confirm the usable opening rather than only the outside measurement.
Mark any retailer constraints directly on the drawing: shelf-lip limits, power access, security hardware, permitted adhesives, barcode visibility or a maximum carton size. A drawing review is a low-cost point to identify an avoidable conflict. The physical sample can then focus on the questions a drawing cannot answer—optical finish, assembly feel, stability, surface protection and real-world product fit.
Define what “ready to install” means for the shipment
At shipment inspection, do not limit the review to whether every acrylic piece looks clean. Confirm that the receiving team has what it needs to put the fixture on the floor: the correct number of parts, hardware or pads, instructions, product-facing graphics, labels and protection. Photograph one complete packed set and one fully assembled, stocked set before the goods leave. Those references make warehouse receiving and store escalation much faster if a carton is damaged or a component is missing.
Frequently asked questions
What thickness of acrylic should I use for a retail display?
There is no universal answer. Thickness depends on product weight, unsupported span, fixture size, bends, joints and expected handling. Provide the product details and ask the supplier to recommend a construction with a drawing or prototype for approval.
Can acrylic retail displays be printed with brand colours?
Yes. UV printing, printed inserts and layered coloured acrylic are common options. Always review a proof or sample with the real product because lighting and packaging colours can affect readability.
How can I reduce scratches during shipping?
Specify the protection method early. Protective film, individual bags, foam or corner guards, separated parts and well-sized cartons can all be relevant depending on the display. Ask to see the pack-out plan before production is complete.
Should a display ship assembled or flat-packed?
Assembled units reduce store set-up but can take more carton space. Flat-packed or partly assembled units can improve shipping efficiency but require clear installation preparation and instructions. The right choice depends on rollout scale, fixture complexity and retailer capability.
Conclusion
Custom acrylic displays succeed when retail use is considered as carefully as appearance. Start with products, space and staff workflow; then use a drawing, sample and shipment-inspection plan to protect the result. That approach produces a display that is easier to approve, easier to replenish and more likely to arrive ready for the floor.
CTA: Send your display brief for a feasibility review
Share your product dimensions, target display location, estimated rollout and visual reference with ACRYLUME. We can help you turn the idea into a practical display brief covering construction, branding, sample review and pack-out preparation.